Friday, 4 October 2013

HALF SKULL - HALLOWEEN INSPIRED

Heyyy Dolls,
halloween is nearly here and ive loved trying new looks this year! After I had such fabulous comments on my Zombie inspired look, I thought I would try this Half Skull/Half Face look, inspired by Lady Gaga's Born this Way video.


This was my first attempt at a skull makeup so sorry if this isn't perfect! 

First I always prep my skin with M.A.C's Fix+ & . I love this product always leaves the skin feeling hydrated & fresh. Then I applied Snazaroo White Cake paint with a flat foundation brush to one part of my face, blending out with a clean sponge. For all of the detail in black I first used a Black jumbo eye pencil in Black-bean by NYX cosmetics, then went over these lines with Snazaroo Black paint to make the colour more intense. For shading I just used a flat eyeliner definer, this helps give definition to the face.


Tips - for a flawless white face, I love to apply plenty of moisturiser before my Fix+ as the face can become sensitive & dry when putting paint on the skin. Also make sure to set your paint with a matte powder, to ensure none of the product smudges throughout the night.


All of the products used on the opposite side of my face are listed below...
☠ Illamasqua light liquid foundation
☠ Ben Nye setting powder in fair
☠ M.A.C lipstick in the colour mac red
☠ OCC stained lip tar, colour (jealous) 
☠ NYC black liquid liner
☠ NYX Doll eyes Mascara
☠ M.A.C skin finish colour (deep-dark)
☠ Illamasqua blush colour (panic)
☠ The Balm's Mary Louminizer 
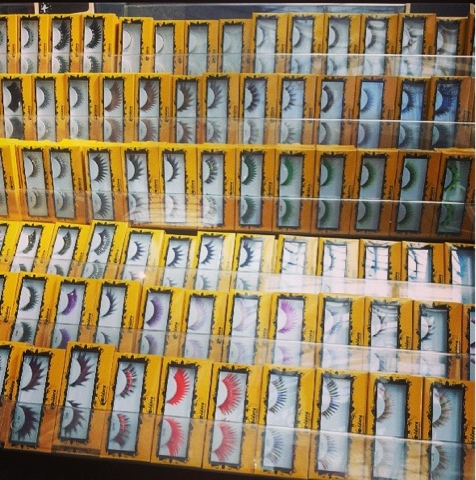
Finishing with one of your favourite lashes!! (Just for one eye)


Disclaimer:  None of the makeup companies I'm talking about are paying me to write about their products. All opinions are my own and All pictures are taken by me unless stated otherwise.

Tuesday, 17 September 2013

SEPTEMBER MAKEOVERS !!

Heyy dolls,
Thought I would upload a few of my recent makeovers that I have done this month. All makeups were applied by me & all include strip lash application!! Hope you like them, and please feel free to comment on any of the images below. Thank you xXx

*Full Face with Coral/Pink glitter smokes*

**Full face with silver/blue glitter smokes**

    **Full face With gold glitter smokes**

  **Full Face with Green Glitter Smokes**


  **Full Face, Blue/purple glitter smokes**


    **Full face with Coral Glitter Smokes**


  **Full Face with Nude/Navy Smokes**


*Full face with Pink/Coral Glitter Smokes*


 **full face with nude/red glitter smokes**

  **Full face with Pastel glitter Smokes**


   **full face, purple/pink glitter smokes**

Sunday, 8 September 2013

ZOMBIE INSPIRED MAKEUP

Heyy dolls..
with halloween not to long away I decided to start off early this year in preparation for this busy time. I love doing my favourite glitzy glam makeups all year round but I love when it comes to halloween & its just something completely different and you really can get as creative as you like.

For my First Halloween look this year I chose to do a Zombie inspired makeup, taking my inspiration from lots of other talented makeup artist's on youtube & by also watching one of my fave zombie films 40 days of Night. 

       
Face & Eye Products used...
☠ Snazaroo Paints in Red & White
☠ Illamasqua rich liquid foundation
☠ Matte Brown eyeshadow from night & day BH Cosmetics palette.
☠ M.A.C Carbon Black eyeshadow

Wound Products
☠ Just a few pieces of Tissue paper or toilet paper what ever works best for you.
☠ Merhon Latex
☠ Merhon Fake Blood (old)
☠ Grimas Cream colour palette
(Red, black & burgandy)
☠ DiamondFx White facepaint
☠ M.A.C Blacktrack Gel liner

 
This was my first time trying this type of special FX makeup so I wasnt to sure how it was going to look, but Im happy with the overall look and the lovely comments and feeback I recieved from Clients. Link below is to a shory video of me creating this Zombie Wound makeup! 


Disclaimer:  None of the makeup companies I'm talking about are paying me to write about their products. All opinions are my own and All pictures are taken by me unless stated otherwise.


Wednesday, 28 August 2013

CANDY YUM YUM LIPSTICK REVIEW

I have been wanting this lipstick ever since I saw it on the US M.A.C Website a few months ago! Its gorgeous and I was so happy that it was in the "Back 2 MAC" scheme .. If you love bright, girly, in your face colours then this is the lipstick for you!!! 

Candy Yum Yum is a Matte finish, so has a long lasting effect on your lips. I wore this all day for work and it really does not smudge at all. I would say it last's on the lips a good 6-8 hours without flaking or making your lips look dry! This is actually the longest lasting colour from all of the matte M.A.C shades that I have. I think because of its bright colour pigmentation it stains the lips for longer. 


When I first saw this lipstick online I knew  it was going to be bright, and I was not disappointed when I saw it in store. It really is one of the brightest pink shades from M.A.C and definitely stands out from all of the other pink lipsticks. I would wear this colour lip with minimal makeup; just a simple black flicked eyeliner and your favourite pair of lashes!


Candy Yum Yum has now been added to  M.A.C's permanent lipstick line YAY! and retails at £15.00. It's also part of the back 2 mac makeup scheme which means if you bring back six empty M.A.C containers to the store you will receive a free lipstick of your choice, excluding the Viva Glam Lipstick line.


Disclaimer:  None of the makeup companies I'm talking about are paying me to write about their products. All opinions are my own and All pictures are taken by me unless stated otherwise.


Tuesday, 27 August 2013

M.A.C MUST HAVES!!

In my daily makeup routine there are six MAC products that I can't live without!! I have to use them personally everyday for my day to day makeup! They are amazing. 


1. Is the gorgeous Strobe liquid. I love this product and prefer it to the strobe cream as its more dewy and lighter on the skin. I love to apply this to my face to give a radiant glow and it also reduces any skin imperfections. I just apply this to my face as I would moisturiser. 

           Photo taken on iphone

2. Studio Fix Fluid foundation is my favourite foundation from MAC. I love how you can create whatever type of coverage you want, unlike a lot of foundations. They're either too thick or too sheer. For flawless coverage, I always use a MAC 187 duo fibre brush to apply the product to my face. This type of foundation also contains SPF 15 to protect your skin from the sun.

           
Photo taken with iPhone 

3. Eyeliner is what I love the most when doing my makeup so i've tried a lot of different liners & MAC's gel liner in black track is by far the best one i've used!! I use this everyday, its so creamy yet never smudges or comes off...Amazing! Apply with a small angle brush or bent liner brush for a smooth line.

            Photo taken from google

4. Mineralise Skin-finish in deep dark is what I use as my bronzer, or sometimes for contour.this product is one of the best I've used out of all the skin finishes by Mac. If you have a darker skin tone this is gorgeous, or Sun-power skin-finish is also another fabulous colour.


5. Studio Finish concealer in Nw15 is what I use to conceal underneath my eyes or on top of any skin imperfections I might have. It just gives the perfect coverage. If you wanted to use this type of concealer to contour I would recommend NC15 as its more of a cooler tone in colour.


6. Finally it's Mac Vanilla Pigment. This is something that I cannot leave out of my makeup routine if I'm going on a night out as I use this to highlight my brow bone, down the centre of my nose & cheekbones! Gives off a gorgeous colour in the light, just apply with your favourite fluffy brush! I use Mac's 227 large fluff brush. 

         Photo taken from google


Disclaimer:  None of the makeup companies I'm talking about are paying me to write about their products. All opinions are my own and All pictures are taken by me unless stated otherwise.

CHAMPAGNE SMOKES!!

Lately I have been loving soft brown & nude smokey eyes, with a simple flicked liner and a natural style strip lash. All you need for gorgeous smokey eyes are, Urban Decay Naked palette, two of your favourite brown eyeshadow shades, mine are Swiss Chocolate and Embark by M.A.C. a nude shimmery pigment, I like to use one called Champagne by Naked Cosmetics, a liquid liner, & your most loved highlighter for the brow bone, I prefer to use Vanilla Pigment also by M.A.C.

            Photo taken on iphone5 

First you need to prep & prime your eye so that your shadow stays in place and lasts you all day, next use some of your vanilla pigment an place into the inner corner of the eye (tear-duct) this will make the eyes appear bigger, also apply this to your brow bone. Then take a blending crease brush & use your lighter brown shade to buff this into the crease line and out to wear your vanilla highlighter ends, using the colour virgin from the naked palette place onto eye until the crease line.


I would then take my darker brown shadow (embark) an start to apply this to the outer v of the eye in a winged shape. Keep doing this until you have got the colour you want, I like to do mine so its more deeper in colour on the outer corners. Then go back over with a blending brush & BLEND BLEND BLEND! Once you have done this take a small about of your shimmery pigment (champagne) and place on top of the virgin colour (urban decay), making sure u don't take it any further than just before your brown smoke. 

Finally apply your liquid liner (always starting from the inner part of the eye) & mascara, I've been using Maybelline Falsies flared which is amazing!! Then apply your lashes using duo glue. Photo's are makeup I have applied onto a client.


Friday, 23 August 2013

IMATS LONDON 2013


On the 22nd & 23rd of June this year i attended IMATS London which stands for the International makeup Artist trade show! This exhibition also takes place in Sydney, Toronto, Los Angeles, New York & Vancouver once every year. This year it was in the Kensington Olympia National Hall. IMATS is a weekend long event were lots of different makeup brands attend to sell their products mostly at a discounted price! There are popular brands there such as Mac Pro, Nars, Make Up Forever, Inglot & Obsessive Compulsive Cosmetics just to name a few. 


You don't have to be Makeup Artist to attend or to receive discount on products. Although there are lots of beauty & makeup seminars throughout the day that are aimed at professional makeup artists. There were also lots makeup demonstrations going on around different booths, my favourite was by altelier paris airbrush makeup, link below is to one that was amazing.


I travelled down with my mum on the train from Liverpool on Friday 21st June & we stayed at the gorgeous Shaftesbury Hotel - Best Western premier on Hogarth road kensington, which was only about 10 minutes away from IMATS. 

            Photo taken from google
            Photo taken with iphone

When we arrived at IMATS everyone was given a large bag by the sponsor's of the event "Royal & Langnickel" brush company who also had a stand there. The whole day is just amazing I could go on about it all day, if you are slightly interested in makeup I would suggest you take a trip there next year & go, its honestly one of the best days! I had saved all year so that I could buy lots of new goodies for myself & for my kit. 


Below are lots of pictures from IMATS weekend and a few photos of what I bought  :-)


Below are photos of the products I bought that weekend at IMATS...


I done a Hugh haul while I was there, picking up some of my favourite things and also trying out some new products, such as Makeup forever HD foundation HD Concealer & their HD Primer, all for just £50 in a makeup forever clear case from the PAM booth. Next was a Freedom 10 square eyeshadow palette from Inglot that I had been wanting to get for a while, the discount was 35% that day at the Inglot booth. I also purchased some gorgeous new glitters from LA Splash & EyeKandy Cosmetics.